
Editing a Spreadsheet
The two ways to edit a spreadsheet are:
- Edit the data itself, such as the labels, numbers, and formulas that make up a spreadsheet.
- Edit the physical layout of the spreadsheet, such as adding or deleting rows and columns, or widening or shrinking the width or heights of rows and columns.
Editing Data in a Cell
To edit data in a single cell, follow these steps:
- Double-click the cell that contains the data you want to edit. Excel displays a cursor in your selected cell.
- Edit your data by using the Backspace or Delete key, or by typing new data.
- If you click a cell, Excel displays the contents of that cell in the Formula bar. You can click and edit data directly in the Formula bar, which can be more convenient for editing large amounts of data.
Changing the size of rows and columns with the mouse
Using the mouse can be a quick way to modify the sizes of rows and columns. To change the height of a row or the width of a column, follow these steps:
- Move the mouse pointer over the bottom line of a row heading, such as the 2 or 18 heading. (Or move the mouse pointer over the right line of the column heading, such as A or D.) The mouse pointer turns into a two-way pointing arrow.
- Hold down the left mouse button and drag (move) the mouse. Excel resizes your row or column.
- Release the left mouse button when you are happy with the size of your row or column.
Typing the size of rows and columns
If you need to resize a row or column to a precise value, it is easier to type a specific value into the Row Height or Column Width dialog box instead. To type a value into a Row Height or Column Width dialog box, follow these steps:
- Click the Home tab and then click the row or column heading that you want to resize. Excel highlights your entire row or column.
- Click the Format icon that appears in the Cells group. A pull-down menu appears and then click Height (if you selected a
row) or Width (if you selected a column). The Row Height or Column Width dialog box appears.
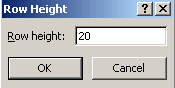
Enter a height for the row. - Type a value and then click OK. Excel resizes your row or column.
Excel measures column width in characters. (A cell defined as 1 character width can display a single letter or number.) Excel measures row height by points where 1 point equals 1/72 inch.
Adding and deleting rows and columns
After you type in labels, numbers, and formulas, you may suddenly realize that you need to add or delete extra rows or columns. To add a row or column, follow these steps:
- Click the Home tab and then click the row or column heading where you want to add another row or column.
- Click the Insert icon in the Cells group. Inserting a row adds a new row above the selected row. Inserting a column adds a new column to the left of the selected column.
To delete a row or column, follow these steps:
- Click the Home tab and then click the row or column heading that you want to delete.
- Click the Delete icon in the Cells group.
- Deleting a row or column deletes any data stored in that row or column.
Adding Sheets
For greater flexibility, Excel lets you create individual spreadsheets that you can save in a single workbook (file). When you load Excel, it automatically provides you with three sheets, but you can add more if you need them. To add a new sheet, choose one of the following:
- Click the Insert Worksheet icon.
- Click the Home tab, click the downward-pointing arrow next to the Insert icon in the Cells group, and then choose Insert Sheet.
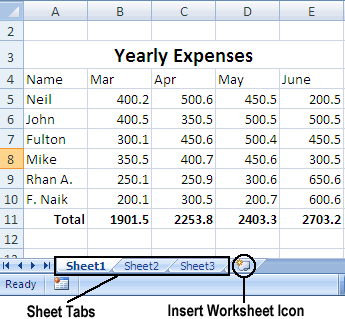
Excel displays the names of individual sheets as tabs.
Renaming sheet
By default, Excel gives each sheet a generic name such as Sheet1. To give your sheets a more descriptive name, follow these steps:
- Choose one of the following:
Double-click the sheet tab that you want to rename. Excel highlights the entire sheet name.
Click the sheet tab you want to rename, click the Home tab, click the Format icon in the Cells group, and choose Rename Sheet.
Right-click the sheet tab you want to rename; when a pop-up menu appears, choose Rename. - Type a new name for your sheet and press Enter when you are done. Your new name appears on the sheet tab.
Rearranging Sheets
You can rearrange the order that your sheets appear in your workbook. To rearrange a sheet, follow these steps:
- Move the mouse pointer over the sheet tab that you want to move and hold down the left mouse button and drag (move) the mouse. The downward-pointing black arrow points where Excel will place your sheet.
- Release the left mouse button to place your sheet in a new order.
Deleting a Sheet
Using multiple sheets may be handy, but you may want to delete a sheet if you do not need it. If you delete a sheet, you also delete all the data stored on that sheet. To delete a sheet, follow these steps:
- Choose one of the following:
Right-click the tab of the sheet you want to delete. When a pop-up menu appears, click Delete.
If your sheet is empty, Excel deletes the sheet right away. If your sheet contains data, a dialog box appears to warn you that you will lose any data stored on that sheet.
Click the Home tab, click the downward-pointing arrow that appears to the right of the Delete icon in the Cells group, and choose Delete Sheet. - Click Delete. Excel deletes your sheet along with any data on it.