Choosing a Printer
These days, it is not unusual to have a couple of printers and printer-type options. For example, you may have a black and white laser printer for quickly and cheaply printing basic text documents. You may also have a color ink-jet printer for printing photos and the occasional color chart or graph. On top of that, perhaps you have a fax modem connected to your computer. (Windows thinks of fax machines as printers. When you think about it, they are sort of long-distance printers.) If you have the full-blown Adobe Acrobat program on your computer, Adobe PDF shows up everywhere you see your computer's printers listed. (Word considers creating PDFs, too, to be a type of printing.)
Having several printer options does not confuse Word one bit. You just need to let Word know which printer you want to use. To do that, open the Print dialog box, which in typical Microsoft fashion you can do at least three different ways. The quickest and easiest to remember is to press Ctrl+P. If you like to mouse up to the ribbon, then choose Office button> Print. For good measure, you can also use the new keyboard shortcut Alt+F, P. However you arrive at the Print box.
The Print dialog box packs a bunch of buttons and menus that you can use to make your printer do exactly what you want. In the upper-left corner, use the drop-down menu to choose your printer. Details about your printer appear below the menu.
At the top of the Print box you find a group of controls labeled Printer. Use the drop-down menu at the top to choose the printer you want to use for this print job. Under this menu you see some details about your printer its type and how it is connected to your computer. On the right, you see two buttons. The top Properties button opens a dialog with details specific to your printer. If you are on a network and share printers, the Find Printer button can help you locate a printer.
Setting Your Default Printer
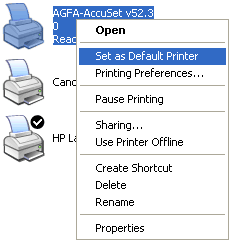
If you do not specifically choose a printer, Windows always uses one particular printer known as the default printer. You will see a check mark next to its printer icon in the list. You can promote any of your printers to this exalted position, but you cannot do it within Word. You need to use the Windows system for this job. Here are the steps:
- In your screen's lower-left corner, go to Start> Setting> Printers and Faxes. Printers and Faxes is in the Start menu's lower-right corner. When you click it, the Start menu goes away, and the Printer and Faxes box opens in a window that looks remarkably like Windows Explorer because that is exactly what it is. You are in a special location in Explorer that is devoted to printers.
- In the Printers and Faxes box, right-click the printer you want to use most of the time, and from the shortcut menu,
choose Set as Default Printer.

Exploring Printer-Specific Properties
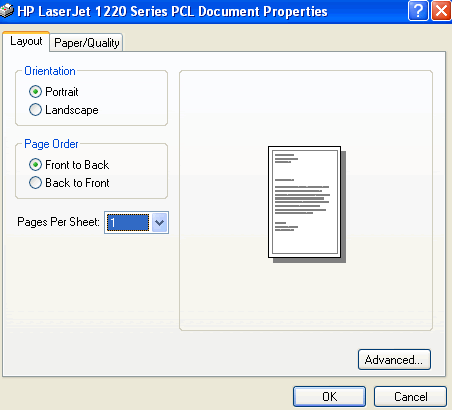
Different printers have different talents. Choose from color printers and black-and-white printers, printers that can print on both sides of the paper, printers that can use huge pieces of paper, and even computer things that behave like printers but are not really printers. Adobe Acrobat and fax machines fall into this category. You need some way to get at the controls for these printers and, obviously, the controls are different for each one. You use the Printer Properties boxes to fine tune the behavior of your printers and printing devices. For example, Figure below shows the properties for a black and white laser printer.

This Properties box for a Hewlett-Packard LaserJet is simple and utilitarian. It gives you a little bit of control over the quality of the print, you can scale your document to print at a larger or smaller size.
