
Exploring Navigation Controllers
The navigation controller (UINavigationController) class presents a series of scenes that represent hierarchical information. In other words, one scene presents a high-level view of a topic, a second scene drills down further, a third scene even further, and so on. For example, the iPhone version of the Contacts application presents a list of contact groups. Touching a group opens a list of contacts within that group. Touching an individual contact displays details on that person. At any point in time, a user can back out of a level of detail and return to the previous level or jump all the way to the starting point (called the root).
Managing this transition between scenes is the navigation controller. It creates a "stack" of view controllers. The root view controller is at the bottom. As a user navigates deeper into the scenes, each successive view controller is pushed on the stack, with the current scene's view controller at the very top. To return to a previous level, the navigation controller pops the topmost controller off the stack and returns to the one below it.
The terminology of push and pop is used to describe navigation controllers throughout the iOS documentation. You'll even be showing new scenes under a navigation controller by using the push segue. Be sure you understand this concept before using it in your application.
Navigation Bars, Items, and Bar Button Items
In addition to managing the stack of view controllers, the navigation controller manages a navigation bar (UINavigationBar). Appearing similar to the toolbar you used in the preceding article, a navigation bar is populated from an instance of a navigation item (UINavigationItem) that is added to each scene that falls under the navigation controller.
By default, the navigation item for a scene contains a title for that scene and a Back button. The Back button is added as a bar button item (UIBarButtonItem) within the navigation item. You can even drag additional bar button items into the navigation item to add your own custom buttons to the navigation bar that is displayed for that scene.
I fully expect that if you've made it through that description, you're getting a bit worried about having to manually handle all of those different objects (and that's why doing this in code is not trivial!). Don't fear: Interface Builder makes it painless, and once you see how each scene is constructed, you'll have no problem working with all of these objects in your apps.
Using Navigation Controllers in Storyboard
Adding a navigation controller to a storyboard is very similar to adding a view controller. It looks a bit different, but the process is the same. Let's assume you're starting with a Single View Application template.
First, you want to establish the code files for one or more view controller subclasses to handle the user's interactions within a given navigation controller scene. This is the same as any other scene. If you don't recall how to add new subclasses to your project.
Open your storyboard file in the Interface Builder Editor. If you want your entire application to fall under the navigation controller, select the view controller in the default view and delete it. (You want to remove the corresponding ViewController.m and .h files, as well.) This removes the default scene. Next, you drag an instance of the navigation controller object from the Object Library into the Document Outline or the editor. This adds what appears to be two scenes to your project, as seen below.
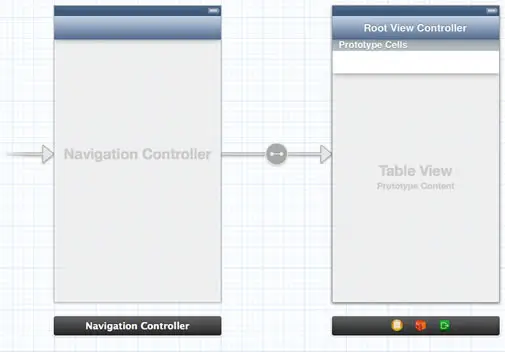
The scene labeled Navigation Controller Scene represents the navigation controller. It is just a placeholder for the object that is going to control all the scenes that fall underneath it. While you won't want to change much about the controller, you can use the Attributes Inspector to customize its appearance slightly (choosing a color scene/tint, if desired).
The navigation controller is connected via a "relationship" to a scene titled with Root View Controller. This is the scene where you want to assign your custom view controller and begin your editing. To be absolutely clear, this scene is exactly like any other scene; it just happens to have the navigation bar at the top and you'll be able to use a push segue to transition to another scene.
The Single View Application template because it gives me an application with an associated storyboard file, and it gives me an initial view, if needed, display before seguing into another view controller. The initial scene, delete it, and delete the default ViewController.h and ViewController.m files. In my opinion this is faster than using an empty application template and having to add a storyboard, and it is the best starting point for many applications.
Setting the Navigation Bar Item Attributes
To change the title in the navigation bar, just double-click and start editing, or select the navigation item in the scene and open the Attributes Inspector (Option+Command+4).
There are three attributes you can change:
- Title: The title string that is shown at the top of the view
- Prompt: A line of text that provides instruction to the user (if needed) and is shown above the title
- Back Button: The text that appears in the Back button of the next scene
Now wait a minute. You can edit the text of the button that appears in a scene you don't even have yet? Yes. By default, when you transition from one navigation controller scene to another, the "title" of the previous scene shows up as the title of the "back" button in the next scene. Sometimes, however, the title may be long, or not necessarily appropriate. In these cases, you can set the Back Button attribute to whatever string you want, and if the user drills down to the next scene, that text will be displayed in the button that takes you back to the scene.
Editing the Back Button text does one additional thing. Because iOS can no longer use its default behavior to create a Back button, it creates a new custom bar button item within the navigation item that contains the title you wanted. You can customize this bar button item even more, changing its color and appearance using the Attributes Inspector.
So far, there is only a single scene under the navigation controller, so the Back button would never be displayed. Let's see how you can chain together multiple scenes to create the "drill-down" hierarchy that navigation controllers are known for.
Remember, you can drag additional bar button items into a scene's navigation item to add toolbar-like controls to the scene.
Adding Additional Navigation Scenes with Push Segues
To add an additional scene to the navigation hierarchy, we follow the same process as adding a new modally presented scene to an application. Begin by adding a control to your navigation controller managed scene that will trigger the transition to another scene. If you want to trigger the segue manually, you don't need anything extra-you'll be connecting view controller to view controller.
Next, drag a new view controller instance into the Document Outline or editor. This creates a new empty scene with no navigation bar, no navigation item... just an empty scene. (At this point, you should assign a custom view controller subclass to handle the code behind the view, but you should be used to that by now.)
Finally, Control-drag from the object that you wish to trigger the segue to the new scene's view controller. When prompted, choose the push segue. You'll see a new segue line added to the originating scene, as well as a bunch of changes to the scene you just connected. The new scene will show the navigation bar and will automatically have its own navigation item added and displayed. You can customize the title and back button, add additional bar button items-the works.
What's even more important to realize here is that you can keep doing this. You can add additional push segues and even branch from multiple segues to follow different paths.
Keep in mind that these are just views, like any other, so you are welcome to add modal segues or popovers in your storyboard as well. One advantage that this article controllers have over modal segues is that transitioning to and from views is handled automatically. You don't need to add any code to use the "back" button within a navigation controller hierarchy, nor (as you learn shortly) any code to switch between scenes in a tab bar controller application.
Sharing Data Between Navigation Scenes
The navigation controller and tab bar controller classes, since they manage a series of views, give us a perfect place to share data. We can access these classes using the parentViewController attribute from any of the scenes we create-just like you used presentingViewController from a modal scene to access the view controller of the scene that presented it.
We can (and will) create a subclass of UINavigationBar that does nothing but include the properties we want to share between scenes, assign that as the identity class of the navigation bar controller that is managing all of our scenes, and then access those properties via parentViewController.