
Managing Your Contacts
One of the paradoxes of modern life is that as contact information becomes more important, you store less and less of it in the easiest database system of all - your memory. Instead of memorizing phone numbers like you used to, you now store your contact info electronically. When you think about it, this isn't exactly surprising. It's not just a landline phone number that you have to remember for each person anymore but also a cell number, e-mail and website addresses, a Twitter username, a physical address, and more. That's a lot to remember, so it makes sense to go the electronic route. And for the iPhone, electronic means the Contacts app, which seems basic enough but is actually loaded with useful features that can help you get organized and get the most out of the contact management side of your life.
Creating a new contact
Easiest way to populate your iPhone Contacts app with a crowd of people, but it might not include everyone in your posse. If someone's missing and you're not around your computer, you can add that person directly to your iPhone Contacts.
Begin by creating a contact with just the basic info: first name, last name, and company name. In subsequent sections, I show you how to add data such as phone numbers and e-mail addresses. Here are the steps to follow:
- In the Home screen, tap the Contacts icon. Note that, in a bit of a head scratcher, Apple has secreted the Contacts app on the second Home screen inside the Utilities folder. Your iPhone opens the All Contacts screen. If you're in the Phone app, you can also tap the Contacts icon.
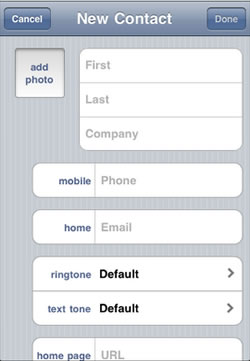
- Tap the plus (+) button at the top-right corner of the screen. The New Contact screen appears, as shown below.
- Tap the First box and then type the person's first name. If you're jotting down the contact data for a company or some other inanimate object, skip to Step 5.
- Tap the Last box and then type the person's surname.
- If you want to note where the person works (or if you're adding a business to your Contacts app), tap the Company box and type the company name.
- Tap Done. Your iPhone saves the new contact and returns you to the All Contacts screen.
Editing an existing contact
Now that your new contact is off to a flying start, you can go ahead and fill in details, such as phone numbers, addresses (e-mail, web, and real world), and anything else you can think of (or have the patience to enter into your iPhone; it can be a lot of tapping!). The next few sections take you through the steps for each type of data. When you're done, be sure to tap Done to preserve all your hard work.
Here are the steps required to open an existing contact for editing:
- In the Home screen, tap the Contacts icon. The All Contacts screen appears.
- Tap the contact you want to edit.
- Tap Edit. Your iPhone displays the contact's data in the Info screen.
- Make your changes, as described in the next few sections.
- Tap Done. Your iPhone saves your work and returns you to the All Contacts screen.
Assigning phone numbers to a contact
Your iPhone is, of course, a phone, so it's only right and natural to use it to call your contact. Sure, but which number? Work? Home? Cell? Fortunately, there's no need to choose just one, because your iPhone is happy to store all these numbers, plus a few more if need be.
Here are the steps to follow to add one or more phone numbers for a contact:
- With the contact's data open for editing, tap inside the Phone field. Your iPhone displays a numeric keypad.
- Type the phone number with area code first. Your iPhone helpfully adds extra stuff like parentheses around the area code and the dash.
- Examine the label box to see if the default label is the one you want. If it is, skip to Step 5; if it's not, tap the label box to open the Label screen.
- Tap the label that best applies to the phone number you're adding (your iPhone automatically sends you back to the Info screen after you tap), such as mobile, iPhone, home, or work.
- Repeat Steps 1 to 4 to add any other numbers you want to store for this contact. Note that each time you add a number, Contacts creates a new phone field below the current field, and you tap inside the new field to add the new number.
Some numbers - such as those used by long-distance calling cards - require a pause in mid-dial to wait for the system to do something. To tell your iPhone to pause for 2 seconds while dialing, tap the +*# key, and then tap the Pause key. The iPhone inserts a comma (,) to indicate the pause location.
Assigning e-mail addresses to a contact
It makes sense that you might want to add a phone number or three for a contact, but would you ever need to enter multiple e-mail addresses? Well, sure you would! Most people have at least a couple of addresses - usually for home and work - and some type-A e-mailers have a dozen or more. Life is too short to enter that many e-mail addresses, but you need at least the important ones if you want to use your iPhone Mail app to send a note to your contacts.
Follow these steps to add one or more e-mail addresses for a contact:
- With the contact's data open for editing, tap inside the Email field. Your iPhone displays the keyboard.
- Type the person's e-mail address.
- Check out the label box to see if the default label is the one you want. If it is, skip to Step 5; if it's not, tap the label box to open the Label screen.
- Tap the label that best applies to the e-mail address you're inserting (your iPhone automatically sends you back to the Info screen after you tap), such as home or work.
- Repeat Steps 1 to 4 to add other e-mail addresses for this contact, as you see fit. Note that each time you add an e-mail address, Contacts creates a new Email field below the current one. You tap inside the new field to add the new address.
Assigning web addresses to a contact
Who on earth doesn't have a website these days? It could be a humble home page, a blog, a Tumblr page, a home business site, or someone's corporate website. Some busy web beavers may even have all five! Whatever web home a person has, it's a good idea to toss the address into her contact data because then you can simply tap it and your iPhone (assuming it can see the Internet from here) immediately fires up Safari and takes you to the site. Does your pal have multiple websites? No sweat: your iPhone is happy to take you to all of them.
To save some wear and tear on your tapping finger, don't bother adding the http:// stuff at the beginning of the address. Your iPhone adds those characters automatically anytime you type an address to visit a site. Same with the www prefix. So if the full address is http://www.wordspy.com, you need only type wordspy.com.
You can add one or more web addresses for a contact by making your way through these steps:
- With the contact's data open for editing, tap inside the URL field. Your iPhone displays the keyboard. Note the . (period) and .com keys in the on-screen keyboard, which come in very handy.
- Type the person's web address.
- Examine the label box to see if the default label is the one you want. If it is, skip to Step 5; if it's not, tap the label box to open the Label screen.
- Tap the label that best applies to the web address you're inserting (your iPhone automatically sends you back to the Info screen after you tap), such as home page or work.
- Repeat Steps 1 to 4 to add other web addresses for this contact. Note that each time you add a web address, Contacts creates a new URL field below the current one and you tap inside the new field to add the new URL.
Assigning social network data to a contact
These days, many of us are far more likely to contact friends, family, and colleagues via social networks, such as Twitter, Facebook, and LinkedIn, than we are through more traditional methods like e-mail. The Contacts app reflects this new reality by enabling you to save social network data for each contact, including data for Twitter, Facebook, LinkedIn, Flickr, and MySpace. Here are the steps to follow to add one or more social network details to a contact:
- With the contact's data open for editing, tap Add Field to open the Add Field dialog.
- Tap Twitter. Yes, you need to tap Twitter even if you are entering data for some other social network. Your iPhone is quirky that way.
- If you want to use a different social network, tap the Twitter label to see a list of social networks.
- Tap the label that suits the social network data you're entering, such as Facebook or Flickr. The Contacts app adds the new label.
- Tap inside the field and then tap the person's username for the chosen social network. Note that as soon as you tap at least one character, Contacts adds a new social network field.
- If necessary, use the new social network field to add another social network, repeating as needed.
Assigning physical addresses to a contact
With all this talk about cell numbers, e-mail addresses, and web addresses, it's easy to forget that people actually live and work somewhere. You may have plenty of contact information in which the location of that somewhere doesn't much matter. But, if you ever need to get from here to there, taking the time to insert a contact's physical address really pays off. Why? Because you need only tap the address and your iPhone displays a map that shows you the precise location. From there you can get directions, see a satellite map of the area, and more.
Tapping out a full address is a bit of work, but as the following steps show, it's not exactly root-canalishly painful:
- With the contact's data open for editing, tap inside the Add New Address field. Your iPhone displays the address fields.
- Tap the first Street field and then type the person's street address.
- If necessary, tap the second Street field, and type even more of the person's street address.
- Tap the City field and type the person's city.
- Tap the State field and type the person's state. Depending on what you later select for the country, this field might have a different name, such as Province.
- Tap the ZIP field and type the ZIP code. Again, depending on what you later select for the country, this field might have a different name, such as Postal Code.
- Tap the Country field to open the Country screen, and then tap the contact's country.
- Examine the label box to see if the default label is the one you want. If it is, skip to Step 10; if it's not, tap the label box to open the Label screen.
- Tap the label that best applies to the physical address you're inserting (your iPhone automatically sends you back to the Info screen after you tap), such as home or work.
- Repeat Steps 1 to 9 to add other addresses for this contact.
Creating a custom label
When you fill out contact data, your iPhone insists that you apply a label to each tidbit, such as home, work, and mobile. If none of the predefined labels fits, you can always just slap on the generic other label. However, this seems so, well, dull. If you've got a phone number or address that you can't shoehorn into any of the prefab labels, get creative and make one up. Here's how:
- With the contact's data open for editing, tap the label beside the field in which you want to work. The Label screen appears.
- Tap Add Custom Label. Scroll to the bottom of the screen to see this command. The Custom Label screen appears.
- Type the custom label.
- Tap Save. Your iPhone returns you to the screen for the field you were editing and applies the new label.
- Edit the field data if necessary.
- Tap Done. Your iPhone saves the contact data as well as your custom label.
Conveniently, you can apply your custom label to any type of contact data. For example, if you create a label named college, you can apply that label to a phone number, e-mail address, web address, or physical address.
If a custom label wears out its welcome, follow these steps to delete it:
- With the contact's data open for editing, tap any label. The Label screen appears.
- Tap Edit. Your iPhone puts the Label screen into Edit mode.
- Tap the Delete icon to the left of the custom label you want to remove. Your iPhone displays a Delete button to the right of the label.
- Tap Delete. Your iPhone deletes the custom label.
- Tap Done. Your iPhone exits Edit mode.
- Tap Cancel. Your iPhone returns you to the Info screen.
Adding extra fields to a contact
The New Contact screen (which appears when you add a contact) and the Info screen (which appears when you edit an existing contact) display only the fields you need for basic contact info. However, these screens lack quite a few common fields. For example, you might need to specify a contact's prefix (such as Dr. or Professor), suffix (such as Jr., Sr., or III), or job title.
Thankfully, your iPhone is merely hiding these and other useful fields. There are 15 hidden fields that you can add to any contact:
- Prefix
- Phonetic First Name
- Phonetic Last Name
- Middle
- Suffix
- Nickname
- Job Title
- Department
- Instant Message
- Birthday
- Date
- Related People
- Notes
The iPhone is only too happy to let you add as many of these extra fields as you want. Here are the steps involved:
- With the contact's data open for editing, tap Add Field. The Add Field screen appears.
- Tap the field that you want to add. Your iPhone adds the field to the contact's data.
- Type the field data.
- Tap Done. Your iPhone saves the new info.
To add the Birthday field to a contact, follow these steps:
- With the contact's data open for editing, tap Add Field. Your iPhone opens the Add Field screen.
- Tap Birthday. The Contacts app adds the birthday field to the contact's data and its nifty scroll wheels appear.
- Scroll the left wheel to set the month for the birth date.
- Scroll the middle wheel to set the day of the month for the birth date.
- Scroll the right wheel to set the year for the birth date.
- Tap Done. Your iPhone saves the birthday info and displays it on the contact's Info screen.
Follow these steps to include an anniversary with a contact:
- With the contact's data open for editing, tap Add Field. The Add Field screen appears.
- Tap Date. The Contacts app adds an anniversary field to the contact and displays the scroll wheels.
- Scroll the left wheel to set the month for the anniversary date.
- Scroll the middle wheel to set the day of the month for the anniversary date.
- Scroll the right wheel to set the year for the anniversary date.
- The label box should already show the anniversary label, but if not, tap the label box, and then tap anniversary.
- Tap Done. The iPhone saves the anniversary and displays it on the contact's Info screen.
Although you can only add one birthday to a contact (not surprisingly), you are free to add multiple anniversaries. Open the contact's data for editing and tap the empty Date field that appears below the most recent date you entered.
Creating a new contact from an electronic business card
Entering a person's contact data by hand is a tedious bit of business at the best of times, so it helps if you can find a faster way to do it. If you can cajole a contact into sending his contact data electronically, then you can add it with just a couple of taps. What do I mean when I talk about sending contact data electronically? Long ago, the world's contact-management gurus came up with a standard file format for contact data - the vCard. It's a kind of digital business card that exists as a separate file. People can pass this data along by attaching their (or someone else's) card to an e-mail message.
If you get a message with contact data, you see an icon for the VCF file.
To get this data into your Contacts app, follow these steps:
- In the Home screen, tap Mail to open the Mail app.
- Tap the message that contains the vCard attachment.
- Tap the icon for the vCard file. Your iPhone opens the vCard.
- Tap Create New Contact. If the person is already in your Contacts app, but the vCard contains new data, tap Add to Existing Contact and then tap the contact.
Working with Facebook contacts
If you've signed in to your Facebook account on your iPhone, iOS automatically updates your Contacts with all your Facebook friends. This means that all the profile data that each person shares with friends is automatically available via Contacts. This often includes info such as the person's profile picture, occupation, company name, e-mail address, location, and birthday, but it can also include the following fields:
- Mobile. Tap this field to call the friend's cell phone.
- URL. Tap this field to visit the friend's website.
- Facebook. Tap this field to view the friend's Facebook profile page.
- IM. Tap this field to send an instant message to the friend.
Although you can add new data to a Facebook contact, you can't edit any data that comes via Facebook. (When you tap Edit to display the Info screen, you see that each Facebook-generated field appears with a Facebook logo beside it and that the field isn't editable.)
Managing contacts with Siri voice commands
If you have an iPhone 5 or 4S, the Siri voice recognition app enables you to locate and query your contacts using simple voice commands. To get started, tap and hold the Home button (or press and hold the Mic button of the iPhone headphones, or the equivalent button on a Bluetooth headset) until Siri appears.
To display one or more contacts, use the following techniques within Siri:
- Displaying a specific contact. Say "Show (or Display or Find) first last," where first and last are the person's first and last names as given in the Contacts list; you can also just say the person's name. If the contact is a business, say "Show (or Display or Find) company," where company is the business name as given in your Contacts list; you can also just say the company name.
- Displaying a contact who has a relationship with you. Say "Show (or Display or Find) relationship," where relationship is the connection you've defined (such as sister or father).
- Displaying a contact with a unique first name. Say "Show (or Display or Find) first," where first is the person's first name as given in your Contacts list.
- Displaying multiple contacts who have some information in common. Say "Find people criteria," where criteria defines the common data. Examples: "Find people named Stevens" or "Find people who live in New York."
To query your contacts, you use the following general syntax:
Question contact info?
Here, question can be "What is" (for general data), "When is" for dates, or "Who is" (for people); contact specifies the name (or relationship) of the contact; and info specifies the type of data you want to retrieve (such as "birthday" or "home phone number"). Here are some examples:
- "What is Paul Mikey's mobile phone number?"
- "When is my brother's anniversary?"
- "What is Rudi Cutlar's address?"
- "Who is Sara's husband?"