
Working with Templates
When you want to quickly create an effective, visually attractive document, one of the most efficient methods is to leverage the design work of other people. With Word 2007, you have access to many ready made, professionally designed templates. A template is a file that stores text, character and paragraph styles, page formatting, and elements such as graphics for use as a pattern in creating other documents.
Unless you specify otherwise, all new documents are based on the Normal document template, which defines a few fairly plain styles, such as paragraph styles for regular text paragraphs, a title, and different levels of headings, and a few character styles that change the look of selected text. The styles from the Normal template appear in the Styles gallery on the Home tab when you create a new blank document. If you create a document based on a different template, the styles defined in that template appear in the Styles gallery, and you can apply those styles to quickly format the text in the document.
Templates are stored with the .dotx file name extension.
In addition to the Normal document template, Word comes with a variety of templates for a variety of documents. To create a document based on one of these templates, you start by displaying the New Document window. Then in the left pane, under Templates, you click Installed Templates, and in the list that appears in the center pane, you click the template you want.
If none of the built-in templates meets your needs, you can look for templates on the Office Online Web site. To create a document based on one of these templates, you start by displaying the New Document window. Then in the left pane, under Microsoft Office Online, you click a category (such as Agendas or Brochures), and in the list that appears in the center pane, you click first the subcategory and then the template you want.
Templates such as Normal contain only formatting information, which in addition to styles can include backgrounds, themes, and so on. These types of templates define the look of the document, and you add your own content. Templates can also contain content that you customize for your own purposes. For example, if you base a new document on a form template from Microsoft Office Online, the text of the form is already in place, and all you have to do is customize it for your organization.
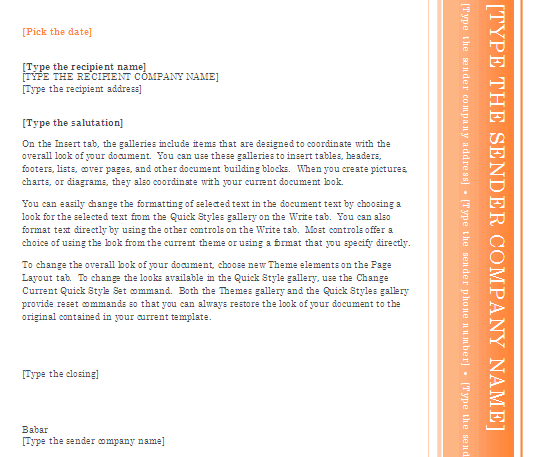
Sometimes, a document based on a Word template displays formatted placeholders surrounded by square brackets for example, [Company Name]. You replace a placeholder with your own text by clicking it and then typing the replacement. If you do not need a placeholder, you simply delete it. After you have entered all the text you need for the document, you save it in the usual way.
The changes you have made affect the document, not the template it is based on, which remains available to help create other documents. In addition to using the templates that come with Word or that you download from Office Online, you can create your own templates. If you routinely create the same type of document, such as a monthly financial report, you can create and format the document once and then save it as a template on which to base future versions of that type of document. You can save your new template with text in it, which is handy if you create many documents with only slight variations. Or you can delete the text so that a document based on it will open as a new, blank document with the styles already defined and ready to apply to whatever content you enter.
If the designation (Compatibility Mode) appears in the title bar when you create a document based on a template, it indicates that the template was created in an earlier version of Word. Usually this will have no effect on your use of the template, but bear in mind that sometimes compatibility can have an impact on functionality.
To save even more time, you can create a document based on one of the Word templates, modify it for example, by adding your own name and address and then save the document as a new template with a different name. The next time you need to create this type of document, you can use your modified version of the template instead of the one provided by Word.
In this section, you will create a new template based on a predefined Word template, and then you will create a new document based on the custom template. You will also convert a document to a template, and you will modify the template by creating a new style. Finally, you will create a document based on the template, and you will apply the new style.
- Click the Microsoft Office Button, click New, and then under Templates in the New Document window, click Installed Templates.
- In the center pane, scroll the Installed Templates list, and double-click the Oriel Letter template. Word opens a new
Letter document based on the selected template, with placeholders for the text you need to supply.
- On the right side of the page, click the [company name] placeholder.
- Click the [address] placeholder, type address and click the [phone number] placeholder, type the number, and then click outside the placeholder.
- After filling the information in Oriel Letter click the Microsoft Office Button, and then click Save As. The Save As dialog box opens.
- In the File name box, type My Letter Template and then click the Save as type arrow, and then in the list, click Word Template. If you want users who have older versions of Word to be able to use the template, click Word 97-2003 Template instead.
- In the Navigation Pane, click Templates. Word displays your Templates folder.
Word expects templates to be stored in your default Templates folder. If you do not store the templates you create in this folder, Word will not display them in your My Templates list. - Click Save, and then close the template.
- Display the New Document window, and under Templates, click My templates. The New dialog box opens.
Applying a Different Template to an Existing Document
A quick and easy way to change the look of an existing document is to apply a new template to it. For this to work smoothly, the new template must use the same paragraph and character style names as the existing template. For example, if the existing template uses the name Heading 1 for top-level headings, the new template must also use the name Heading 1. If the style names do not match, you can still apply a new template to a document and then use the Styles task pane to find all instances of each particular style and replace them with one of the new template's corresponding styles. To apply a new template to an open document:
- Click the Microsoft Office Button, click Word Options, and in the left pane, click Add-Ins. At the bottom of the right pane, click the Manage arrow, and in the list, click Templates. Then click Go. The Templates And Add-ins dialog box opens.
- Under Document Template, click Attach. The Attach Template dialog box opens.
- Locate and double-click the template you want to attach.
- In the Templates and Add-ins dialog box, select the Automatically update document styles check box, and then click OK. The new template is attached and the styles used in the document change to reflect their definitions in the new template.
To replace all instances of one style with another style:
- On the Home tab, in the Styles group, click the Styles Dialog Box Launcher.
- In the Styles list, point to a style you want to replace, click the arrow that appears, and then click Select All Instance(s). Word selects all the text to which that style has been applied.
- In the Styles list, click the style you want to apply.
- Repeat Steps 2 and 3 for each style that needs to be replaced.