
Creating and Saving Custom Layouts
Microsoft goes to work well in advance of releasing a new product to put together templates and document layouts for use with the final product. Even so, when the product is released it is impossible to include every layout and template that you might need. Every organization has different requirements. And with different requirements comes the need for custom layouts.
To make PowerPoint (and other office programs) as usable as possible, PowerPoint gives you the capability to create custom layouts that suit your needs. However, if you tried to figure this out without some help, you could spend days on it and still not locate the right commands. The names have changed, and with the change in controls, you may not recognize the controls that you need. Here is how it is done.
- Either in an existing presentation or in a new slide, click the View tab, and then select Slide Master from the Ribbon, so you are taken to the Master View, and the Ribbon and tabs change to reflect the tools you will need to create your custom slide.
- Click Insert Slide Master to add a new master slide to your presentation. A screen with several master-slide layouts appears, select the slide you want to work from. Don't worry if there are elements in the existing masters that you don't want, you can remove them by right-clicking the border of the element (also called placeholder) and selecting Cut.
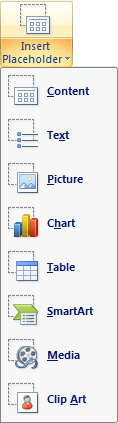
- To design your custom layout, select Insert Placeholder, as shown in Figure below. Then select the placeholder that you
would like to insert on the slide and define the area on the slide where you want to insert the placeholder by dragging your
mouse across the desired area on the slide template.
Insert placeholders on your custom slide to complete the desired layout. - You can also toggle titles and footers on and off by placing a check mark in or removing it from the box next to these options. When you have finished laying out your slide, click File and select Save As> PowerPoint Presentation, and then add the name of the file and use the Save type as drop-down menu to select PowerPoint Template.
When you have finished with your custom slide, remember to select Rename and give it a meaningful name that will help you locate the slide when you need it. To return to your original document, all you need to do is click Close on the Slide Master tab.
Then you can add your custom slide to any document by selecting the Insert tab. Click Add Slide> Reuse Slide, and then navigate to and select the custom slide that you have created. It can be reused any number of times in any number of presentations. If there is a specific slide layout that you use regularly, this is the fastest way to ensure that it is always available to you.
When you add a custom slide to an existing presentation, the presentation theme is automatically added to the slide. If you prefer to have a different theme, you will have to change it manually.